Woodworker's Journal 2004 Summer, страница 30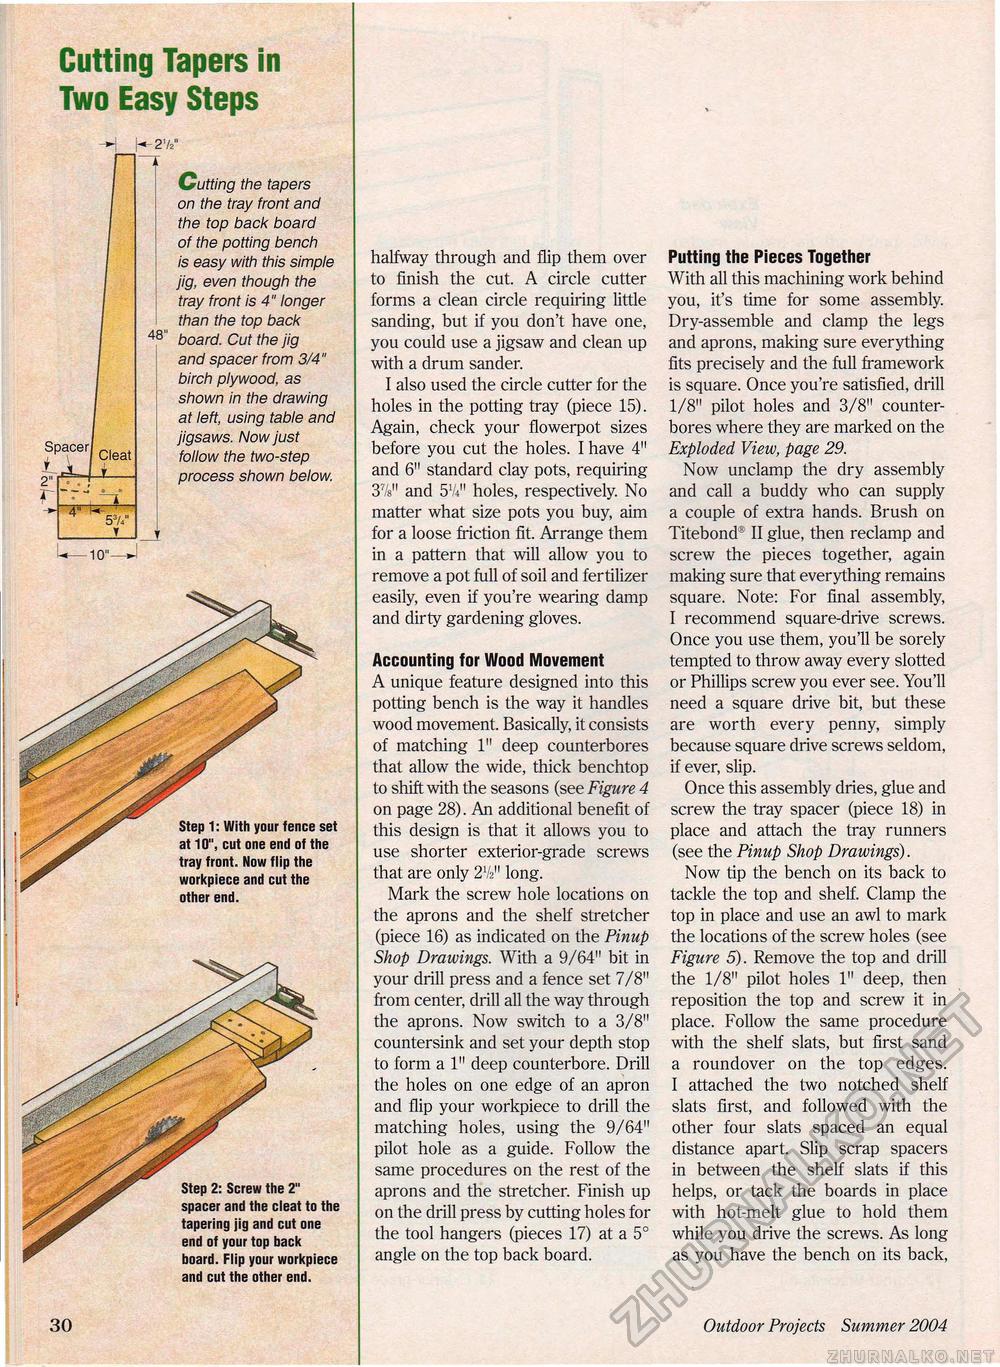
Cutting Tapers in Two Easy Steps Gutting the tapers on the tray front and the top back board of the potting bench is easy with this simple jig, even though the tray front is 4" longer than the top back 48' board. Cut the jig and spacer from 3/4" birch plywood, as shown in the drawing at left, using table and jigsaws. Now just follow the two-step process shown below. Step 1: With your fence set at 10", cut one end of the tray front. Now flip the workpiece and cut the other end. Step 2: Screw the 2" spacer and the cleat to the tapering jig and cut one end of your top back board. Flip your workpiece and cut the other end. halfway through and flip them over to finish the cut. A circle cutter forms a clean circle requiring little sanding, but if you don't have one, you could use a jigsaw and clean up with a drum sander. I also used the circle cutter for the holes in the potting tray (piece 15). Again, check your flowerpot sizes before you cut the holes. I have 4" and 6" standard clay pots, requiring 37/s" and 5V4M holes, respectively. No matter what size pots you buy, aim for a loose friction fit. Arrange them in a pattern that will allow you to remove a pot full of soil and fertilizer easily, even if you're wearing damp and dirty gardening gloves. Accounting for Wood Movement A unique feature designed into this potting bench is the way it handles wood movement. Basically, it consists of matching 1" deep counterbores that allow the wide, thick benchtop to shift with the seasons (see Figure 4 on page 28). An additional benefit of this design is that it allows you to use shorter exterior-grade screws that are only 2W long. Mark the screw hole locations on the aprons and the shelf stretcher (piece 16) as indicated on the Pinup Shop Drawings. With a 9/64" bit in your drill press and a fence set 7/8" from center, drill all the way through the aprons. Now switch to a 3/8" countersink and set your depth stop to form a 1" deep counterbore. Drill the holes on one edge of an apron and flip your workpiece to drill the matching holes, using the 9/64" pilot hole as a guide. Follow the same procedures on the rest of the aprons and the stretcher. Finish up on the drill press by cutting holes for the tool hangers (pieces 17) at a 5° angle on the top back board. Putting the Pieces Together With all this machining work behind you, it's time for some assembly. Dry-assemble and clamp the legs and aprons, making sure everything fits precisely and the full framework is square. Once you're satisfied, drill 1/8" pilot holes and 3/8" counter-bores where they are marked on the Exploded View, page 29. Now unclamp the dry assembly and call a buddy who can supply a couple of extra hands. Brush on Titebond® II glue, then reclamp and screw the pieces together, again making sure that everything remains square. Note: For final assembly, I recommend square-drive screws. Once you use them, you'll be sorely tempted to throw away every slotted or Phillips screw you ever see. You'll need a square drive bit, but these are worth every penny, simply because square drive screws seldom, if ever, slip. Once this assembly dries, glue and screw the tray spacer (piece 18) in place and attach the tray runners (see the Pinup Shop Drawings). Now tip the bench on its back to tackle the top and shelf. Clamp the top in place and use an awl to mark the locations of the screw holes (see Figure 5). Remove the top and drill the 1/8" pilot holes 1" deep, then reposition the top and screw it in place. Follow the same procedure with the shelf slats, but first sand a roundover on the top edges. I attached the two notched shelf slats first, and followed with the other four slats spaced an equal distance apart. Slip scrap spacers in between the shelf slats if this helps, or tack the boards in place with hot-melt glue to hold them while you drive the screws. As long as you have the bench on its back, 30 Outdoor Projects Summer 2004 £ |


